Desserts
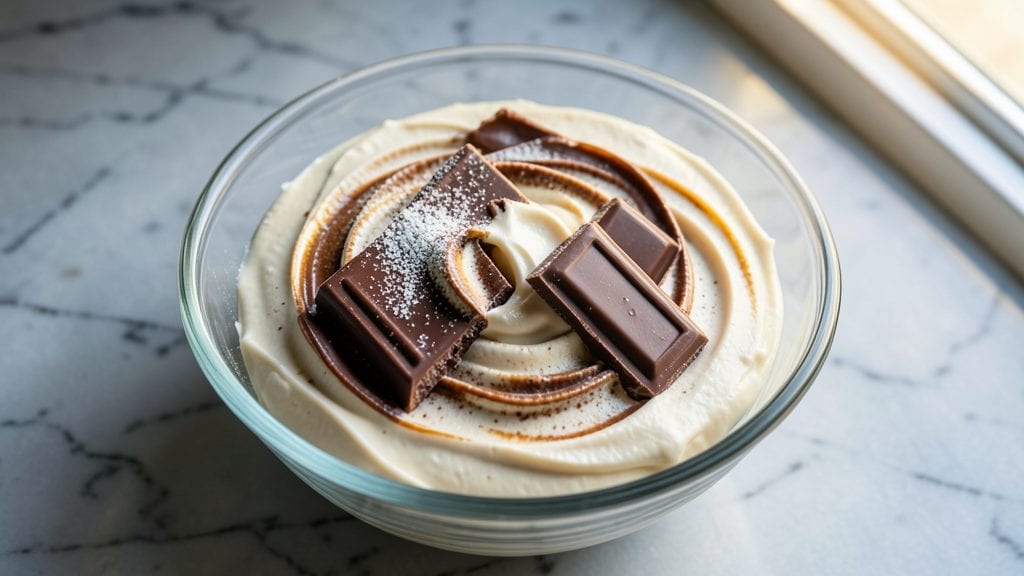
This Hershey's chocolate buttercream frosting delivers the perfect balance of rich cocoa flavor and silky smooth texture—without that dreaded separation problem. The secret lies in precise ingredient ratios and a simple technique that ensures velvety swirls every time.
I developed this recipe after years of testing, and it consistently produces frosting that's stable, flavorful, and ready to pipe or spread.
The foundation of great buttercream starts with high-quality ingredients: unsalted butter, powdered sugar, and of course, Hershey's chocolate for that classic milk chocolate taste. We'll incorporate milk to achieve the ideal consistency, and a touch of vanilla extract enhances the chocolate flavor.
The key technique involves melting the chocolate and butter together before gradually incorporating the powdered sugar and milk—this prevents graininess and separation.
What you'll end up with is a luxurious buttercream that's rich, creamy, and perfectly sweet—ideal for layering cakes, filling cupcakes, or decorating cookies. The texture remains stable even in warm kitchens, and it holds its shape beautifully when piped.
This frosting stays fresh for up to 5 days in the refrigerator, making it perfect for baking ahead of time.
Whether you're frosting a birthday cake, filling donuts, or creating elegant desserts, this recipe delivers professional-quality results with simple ingredients. Let's get started on creating your perfect chocolate buttercream.
Ingredients for hershey's chocolate buttercream frosting
Six ingredients transform into velvety perfection—no separation, no lumps, just pure chocolate decadence.
| Ingredient | Amount | Notes |
|---|---|---|
| Unsalted Butter 🧈 | 1 cup | Cold, cut into tablespoon-sized pieces |
| Hershey's Milk Chocolate Bars 🍫 | 8 oz | High-quality, chopped into chips |
| Powdered Sugar 🍚 | 3 cups | Sifted for smooth texture |
| Whole Milk 🥛 | ½ cup | Room temperature preferred |
| Pure Vanilla Extract 🌿 | 1 tsp | High-quality, Madagascar bourbon preferred |
| Diamond Crystal Kosher Salt 🧂 | ¼ tsp | Fine grain for delicate seasoning |
The butter and chocolate are your power duo. Use European-style butter like Plugrá if you want extra richness, but regular unsalted works perfectly fine. Chop the chocolate into even pieces—Hershey's bars are ideal because they melt smoothly without burning. The powdered sugar needs to be sifted (trust me, it makes a difference), and Domino brand is my go-to for consistent results. Pro tip: buy your chocolate from Gourmet Gift Baskets or Williams Sonoma if you want the absolute best—those bars melt like a dream. For the milk, whole is non-negotiable here—it adds the perfect creaminess without making the frosting too thin.
No Hershey's bars? Ghirardelli squares or Nestlé Toll House chips work in a pinch, but adjust the amount slightly—Ghirardelli's a bit richer. Short on powdered sugar? Confectioners' sugar from the bulk bins is cheaper and just as good. Want to make this dairy-free? Swap the butter for vegetable shortening (like Crisco) and use coconut milk instead of dairy milk—though the texture won't be identical. The vanilla extract is where you can splurge: McCormick or Nielsen-Massey brands are worth the investment. And if you're worried about the frosting being too sweet, add the salt last—it balances everything beautifully without overpowering.
This frosting keeps like a dream. Store it in an airtight container with parchment paper between layers for up to 5 days in the fridge. For longer storage, freeze portions for up to 3 months—just thaw at room temperature before using. The key to reheating? Microwave in 20-second bursts until smooth, stirring between each. And here's a game-changer: if you're making this ahead for a party, pipe it into a freezer bag, snip the corner, and freeze. Pipe directly onto cakes or cookies—no thawing needed! Just add a quick 10-second warm-up before decorating.
Why You'll Love This Recipe
- Pantry Magic: I swear by this recipe because it uses what I already have—no special trips to the store. That Hershey’s bar in the back of my cupboard? Perfect. The butter I forgot to finish? No problem. Just melt, mix, and boom—rich, velvety frosting without hunting for obscure ingredients.
- Rich Without Effort: The milk and vanilla cut the sweetness just right, but the real star is that melted chocolate swirled into the buttercream. It’s not too heavy, not too cloying—just exactly the kind of chocolatey goodness that makes cakes taste like a bakery’s secret.
- Birthday to Bake Sale: This frosting works for everything: slather it on cupcakes for a party, pipe it into a sheet cake for a last-minute celebration, or even dollop it over brownies when I’m craving something indulgent. (Yes, even on a Tuesday night.)
Step-by-step instructions for Hershey's chocolate buttercream frosting
This velvety buttercream delivers restaurant-quality swirls without separation—here's how to make it foolproof.
Melt the Chocolate and Butter Together
In a medium heatproof bowl, combine the 8 oz chopped Hershey's milk chocolate bars and the 1 cup cold unsalted butter. Place this bowl over a pot of simmering water, ensuring the bottom of the bowl doesn't touch the water. Stir frequently with a silicone spatula until both the chocolate and butter melt completely and the mixture reaches 120°F. You'll know it's ready when the chocolate is fully incorporated and the mixture is smooth and glossy.
Remove the bowl from the heat immediately and let it cool slightly for 5 minutes. This step is crucial—if you proceed with hot ingredients, you'll risk melting the buttercream later. The mixture should be warm but not hot to the touch. Here's the thing: the chocolate needs to melt completely to dissolve properly, but we want to preserve the butter's structure for that perfect pipeable consistency.
Whip the Buttercream to Light and Fluffy
In a stand mixer fitted with the whisk attachment, combine the 3 cups sifted powdered sugar, the 0.5 cup room temperature whole milk, the 1 tsp pure vanilla extract, and the 0.25 tsp diamond crystal kosher salt. Mix on medium speed for 1 minute until all ingredients are fully incorporated and the sugar is dissolved. This ensures a smooth, lump-free base for your buttercream.
With the mixer running on low speed, gradually add the cooled chocolate-butter mixture in a slow, steady stream. This prevents the buttercream from curdling and helps incorporate air evenly. Once fully combined, increase the speed to medium-high and whip for 3-4 minutes until the mixture is light, fluffy, and holds soft peaks when you lift the whisk. You're aiming for that perfect cloud-like texture that's neither too stiff nor too runny.
Achieve the Perfect Consistency
Stop the mixer and scrape down the sides of the bowl with a silicone spatula to ensure even mixing. Taste a small spoonful and adjust the flavor if needed—you can add more powdered sugar for sweetness or a splash of milk for creaminess. This is where you'll notice the magic: the buttercream should be thick enough to hold its shape when piped but still spreadable. If it's too stiff, add 1 teaspoon of milk at a time and mix until smooth. If it's too thin, add 1 tablespoon of powdered sugar at a time.
For that signature swirl effect, divide the buttercream into two bowls. Leave one portion as is and tint the other with a drop of red food coloring. Fold the coloring in gently with a spatula until evenly distributed. Now you're ready to create those beautiful marbled swirls that make this frosting truly special. The key here is patience—don't rush the mixing or you'll end up with a dense, heavy frosting instead of the light, airy texture we're after.
Use Immediately or Store Properly
Transfer the buttercream to a piping bag fitted with a star tip for swirls or a round tip for borders. Pipe onto your cakes or cupcakes immediately for the best results. If you need to store it, cover the bowl tightly with plastic wrap pressed directly against the surface to prevent a skin from forming. Refrigerate for up to 3 days or freeze for up to 1 month. When ready to use, let it come to room temperature and re-whip briefly with a hand mixer to restore its light, fluffy texture.
Here's the secret to long-lasting perfection: don't let the buttercream sit at room temperature for more than 2 hours before using. The longer it sits, the more the butterfat can separate from the sugar mixture. If this happens, simply re-whip with a hand mixer until smooth again. This buttercream is incredibly versatile—use it for layering cakes, filling donuts, or even as a dip for fruit. The possibilities are endless, but the technique remains the same: melt, whip, and pipe with confidence.
Pro Tips For Making Hershey'S Chocolate Buttercream Frosting
- Melt Chocolate Slowly: Chop the Hershey’s bars into small, even pieces—think rice-sized—not giant chunks. Melt them in a heatproof bowl over barely simmering water (double boiler), stirring every 30 seconds, until smooth but not hot enough to scorch. I learned this the hard way after watching a batch turn grainy from uneven melting.
- Cool Butter Before Mixing: Let your unsalted butter sit at room temperature for 30-45 minutes before whipping it with powdered sugar and milk. Cold butter creates lumps; softened butter blends like a dream. (Yes, even if you’re impatient like me—this isn’t the step to rush.)
- Strain the Mixture: After combining melted chocolate, butter, and powdered sugar, strain the frosting through a fine-mesh sieve into your mixing bowl. This removes any grit from the chocolate or sugar, giving you a silky texture. Sounds weird, but it works—your frosting will look (and taste) restaurant-quality.
- Add Vanilla Last: Stir in the vanilla extract after the frosting has cooled slightly—around 70°F (21°C)—not straight from the heat. This preserves its aroma and prevents it from cooking off. I skip this when I’m lazy, but the difference in flavor is noticeable.
Troubleshooting great hershey's chocolate buttercream frosting
Grainy Texture Fix
If your buttercream turns grainy, it’s usually because the powdered sugar wasn’t sifted or the chocolate didn’t melt completely. First, sift the sugar through a fine-mesh sieve to break up any clumps.
Then, re-melt the chocolate and butter mixture over a double boiler until it reaches 120°F again, ensuring it’s fully smooth. Once cooled, re-whip the buttercream with your stand mixer for 2-3 minutes—this redistributes the sugar particles evenly.
For extra insurance, strain the mixture through a fine-mesh sieve before piping. 💡
Separation Solution
Buttercream separation happens when the butterfat and sugar mixture split, often due to temperature fluctuations. If this occurs, don’t panic! Gently re-whip the frosting with a hand mixer on medium speed for 3-4 minutes until it smooths out.
If it’s still too thin, add 1 tablespoon of powdered sugar at a time. For a thicker consistency, chill the bowl in the freezer for 10 minutes while mixing—this helps the butter re-solidify slightly.
Pro tip: Always let the chocolate-butter mixture cool to 110°F before adding it to the sugar base to prevent separation.
Too Thin or Too Thick?
Adjusting consistency is all about balance. If your buttercream is too thin, add powdered sugar 1 tablespoon at a time, mixing well after each addition. For a thicker texture, incorporate 1 teaspoon of milk or heavy cream. Remember, the frosting should hold its shape when piped but still be spreadable.
If you’ve added too much sugar and it’s grainy, strain it through a fine-mesh sieve to restore smoothness. For a quick fix, place the bowl in the refrigerator for 15-20 minutes—this helps thicken it naturally without altering the flavor.
Chocolate Not Melting Properly
If your chocolate has streaks or doesn’t melt smoothly, it’s likely due to uneven heat or old chocolate. First, ensure your double boiler isn’t too hot—aim for a gentle simmer, not a boil. Stir constantly with a silicone spatula to distribute heat evenly.
If the chocolate is old or contains additives, replace it with fresh Hershey’s bars or high-quality chocolate chips. For stubborn clumps, place the bowl in the microwave for 10-second bursts on low power, stirring in between, until fully melted.
Always let the mixture cool to 110°F before combining with the sugar base to avoid curdling.
Frosting Too Sweet
If your buttercream tastes overwhelmingly sweet, balance it with a pinch of kosher salt or a splash of vanilla extract. For a more sophisticated flavor, add 1 teaspoon of espresso powder or orange zest—these enhance the chocolate without adding sweetness.
If you prefer a less sweet frosting, reduce the powdered sugar by ¼ cup and increase the milk by 1 tablespoon. Taste as you go, adjusting incrementally to avoid overcorrecting. A well-seasoned buttercream should have a harmonious blend of sweetness and depth.
Piping Issues
If your buttercream isn’t piping smoothly, it’s likely too thick or too cold. Let it sit at room temperature for 10-15 minutes before attempting to pipe. If it’s still stubborn, gently re-whip it with a hand mixer until it reaches a spreadable consistency.
For a smoother flow, add ½ teaspoon of milk at a time. If the frosting is too runny, chill the piping bag in the freezer for 5 minutes before piping—this helps it hold its shape better.
Always use a clean, dry piping tip and apply gentle, even pressure to avoid clogging. 🎂
Nutrition facts
Frequently asked questions
Can I substitute white chocolate or dark chocolate for the Hershey's milk chocolate?
White chocolate won't work here—the recipe relies on milk chocolate's creamy richness. For dark chocolate, use a 60-70% cacao bar and reduce the powdered sugar by ¼ cup to balance the intensity. The Hershey's milk chocolate's smooth melt is key to that signature velvety texture.
How do I fix buttercream that separated after making it?
Don't worry—this is easily fixable! Gently re-whip the frosting with a hand mixer on medium speed for 3-4 minutes until smooth. If it's still too thin, add 1 tablespoon powdered sugar at a time. For thicker consistency, chill the bowl for 10 minutes while mixing. The secret is patience—never rush the process.
Can I make this frosting ahead of time?
Store it in an airtight container with parchment between layers for up to 5 days in the fridge. For longer storage, freeze portions for 3 months. Thaw at room temperature and re-whip briefly before using. Pro tip: Pipe it into a freezer bag, snip the corner, and freeze—pipe directly onto desserts without thawing!
Why does my frosting turn grainy?
Graininess usually means unsifted powdered sugar or unmelted chocolate. First, sift the sugar through a fine-mesh sieve. Then, re-melt the chocolate-butter mixture until completely smooth (120°F). Re-whip the frosting for 2-3 minutes—this redistributes particles. For extra smoothness, strain through a sieve before piping.
What's the best piping tip for swirls?
A Wilton 1M tip creates perfect rosettes, while a star tip (Wilton 104 or 1M) gives elegant swirls. For borders, use a round tip (Wilton 2 or 3). Always ensure your piping bag is completely filled and the tip is clean/dry to prevent clogging. Apply gentle, even pressure for consistent results.